1. You will need to be connected to UAB's Campus VPN or Hospital VPN, before you may proceed with the following steps.
2. If you do not already have it installed, your will need to download Microsoft Windows App from the Mac App Store: https://apps.apple.com/us/app/windows-app/id1295203466?mt=12
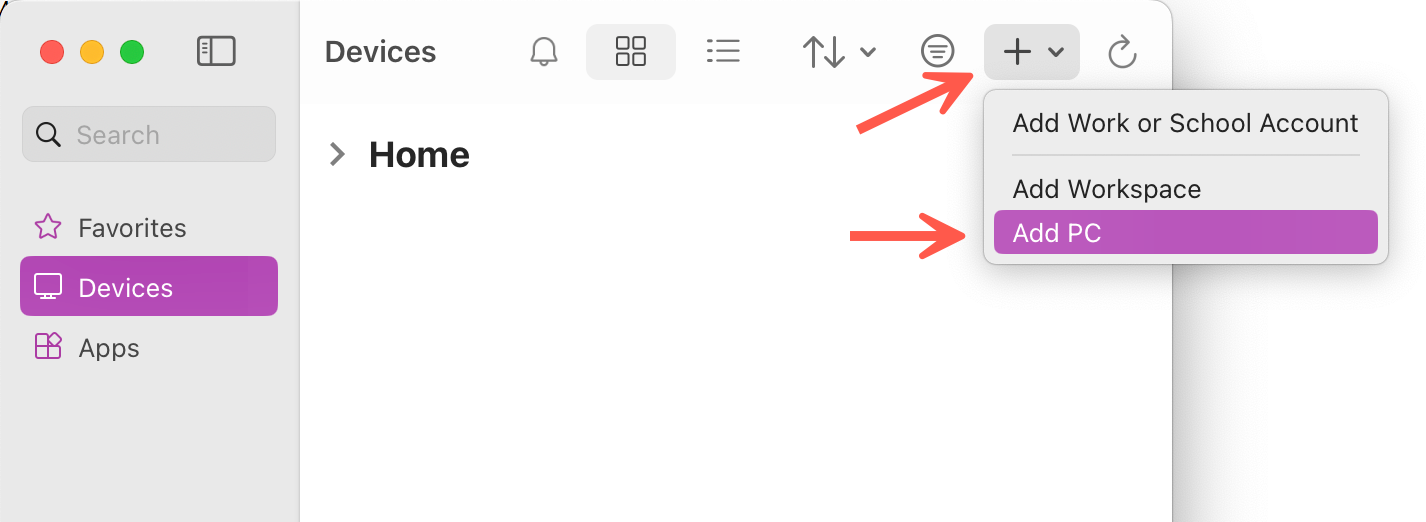
3. After installing and opening the app, you will need to create a new connection. Within the app, select "Add PC".
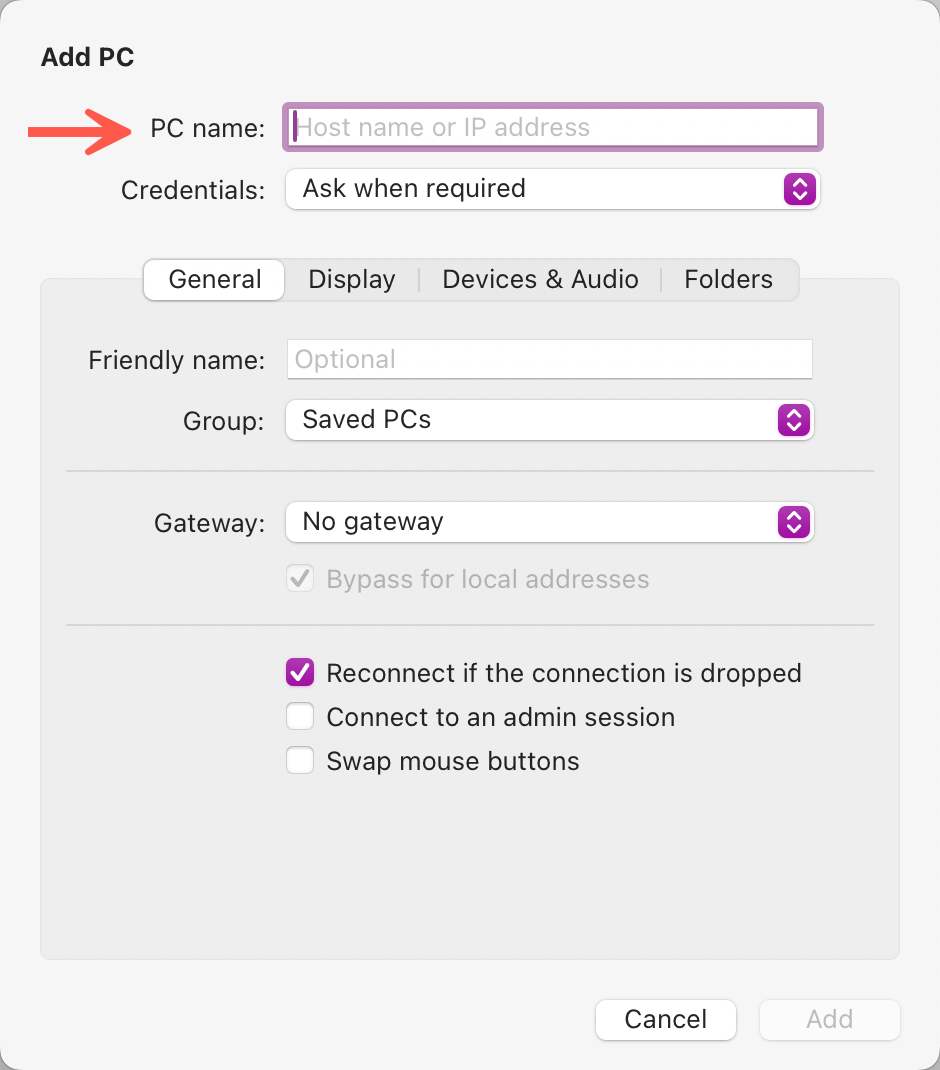
4. For the most basic connection, all you have to do is type the IP address or Full Qualified Domain Name (FQDN) in for the PC name. Leave everything the default. Click Add. If you do not know your IP address or FQDN, then you can contact DOM IT and request remote access to your office computer. They will provide that information.
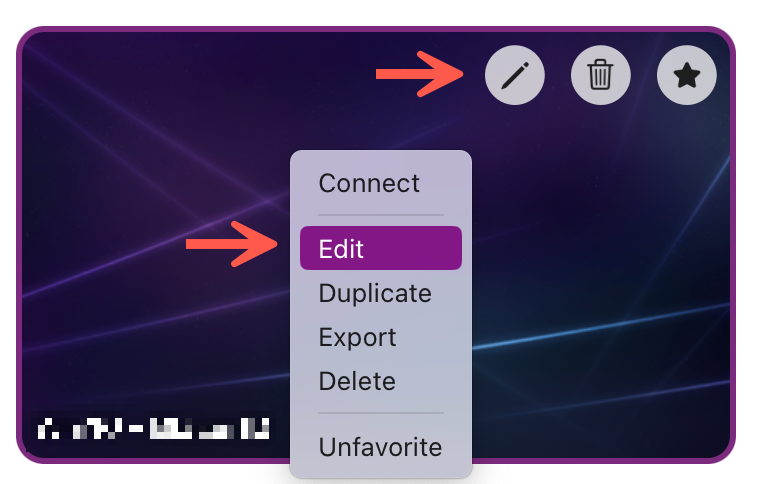
5. Back on the main Remote Desktop window, you should see the new PC. To establish the connection, you can double-click on the system or Ctrl+click (right-click) on it and select Connect as well.
6. When it starts connecting it will prompt you for your Username and Password. Enter your username in the “uab\YourBlazerID” format.
7. If you receive a notifcation that the certificate cannot be verified, this is normal. Please select "Continue"
8. When it finishes logging on, it will start in full-screen mode by default. Just move the mouse to the top of the screen to the get the menu and window options.
Optional Settings
The next set of instructions are optional and are provided if you want to customize. Some of this depends on whether or not you have a Mac with a retina screen or want to resize the Remote Desktop window instead of running it in full-screen mode.
9. Back on the main screen, you will need to select Edit.
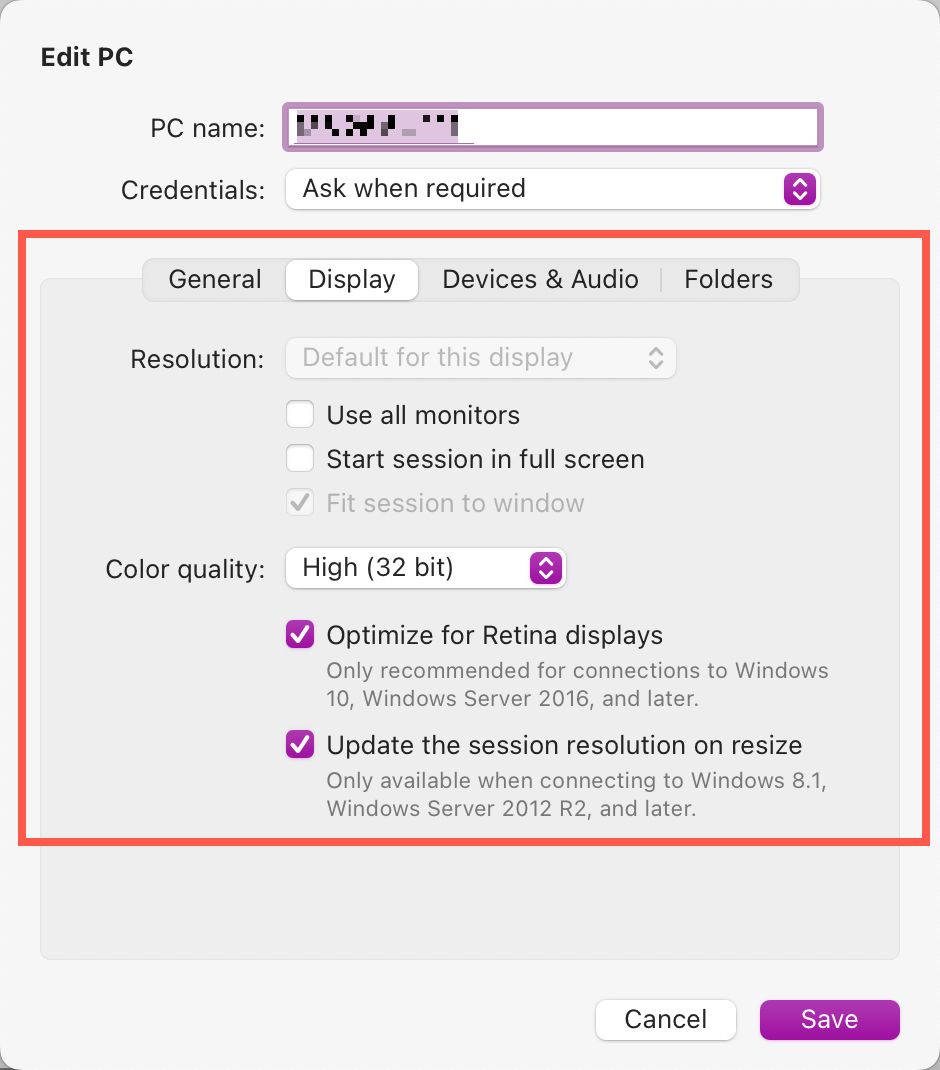
10. Select the Display tab and modify what you see fit. Here are the settings I have found to be the most useful on modern, retina Macs.
Note: If your VPN connection to UAB happens to drop offline, then your Remote Desktop connection will also stop.