-
Seal In-Lab RAM Waste Container and Request Waste Pickup (Unsealed Sources)
NOTE: You must first enter all radioactivity into their proper waste containers in the Radioactive Source Use and Waste workflow instructions in the Handbook.
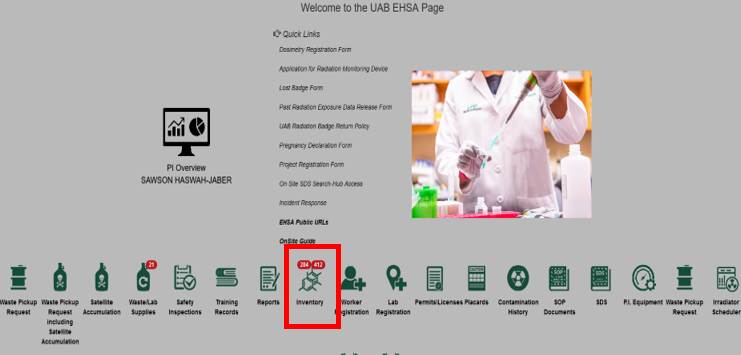
When no more waste will be added to a container or the container is full, physically seal the container, and then it must be marked "Sealed" in EHSA and a waste pickup request completed.- As an Administrator, click the Inventory icon.
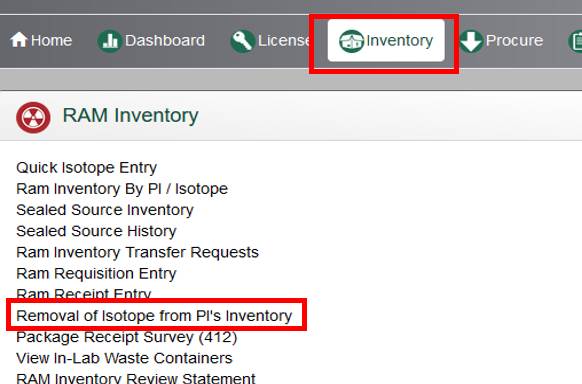
- Under "RAM Inventory", click Removal of Isotope from PI's Inventory.
- Select the name of your radioactive material Authorized User from the “PI” drop-down menu.
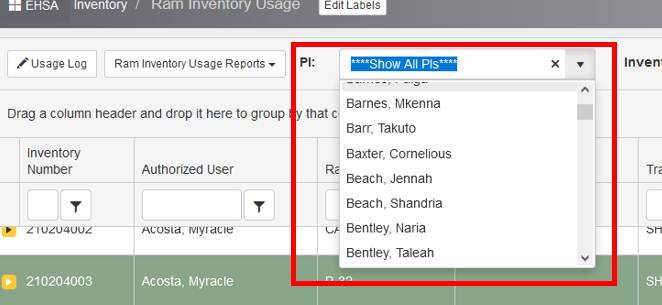
- Click the View In-Lab Waste button to the right of the “PI” field.

- Find the row with the "Container #" that matches the "Waste ID #" on the yellow waste tag:
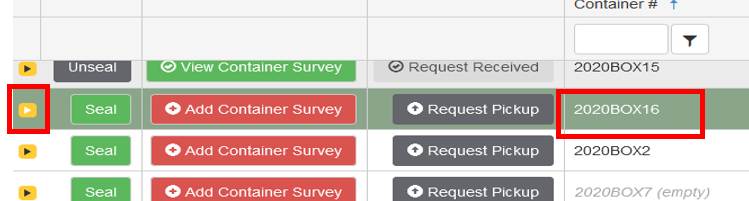
Click the yellow arrow and review the contents for accuracy.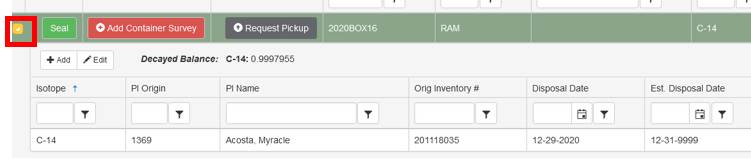
Click the green Seal button. A Confirm prompt will appear. Click Seal on this prompt.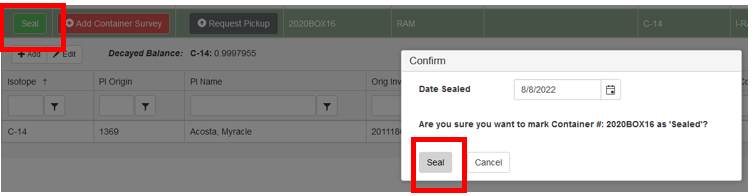
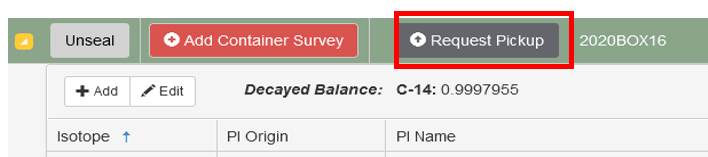
- Click the Request Pickup button on the row from step 5.
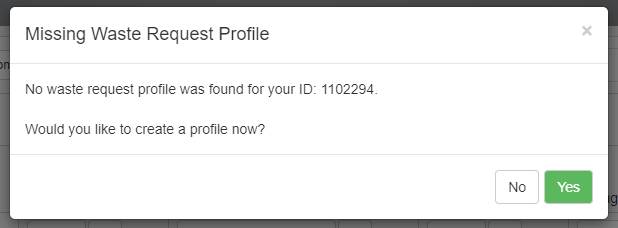
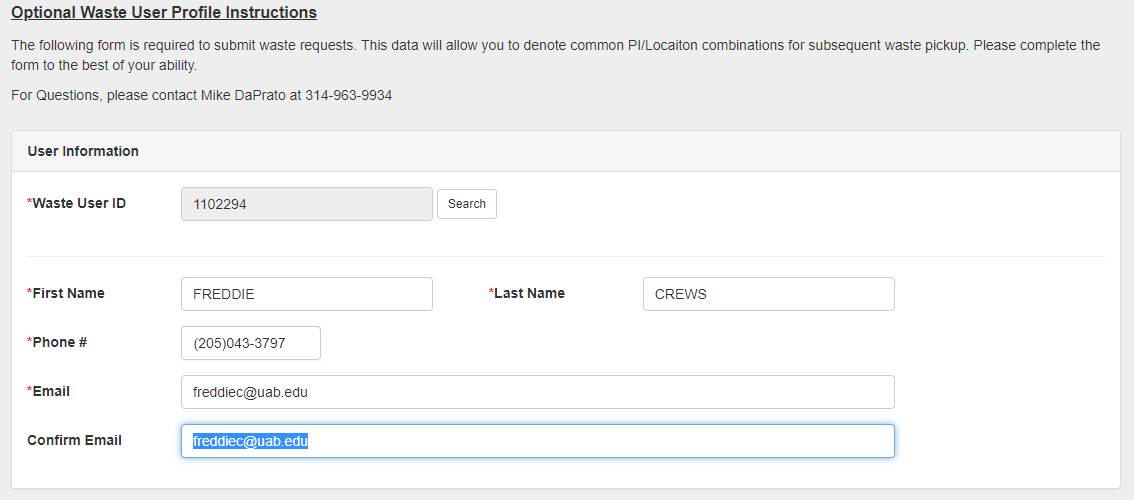
- If one has not been created already, create a Waste User ID.
- Fill out Waste Request Information pop-up.
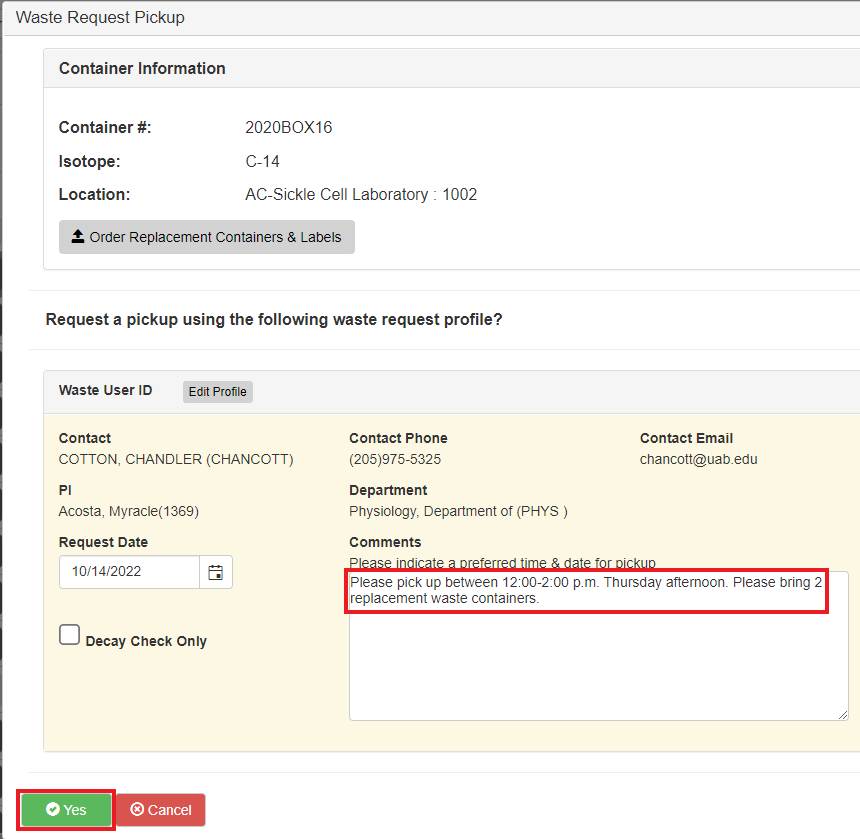
- A Waste Request Pickup dialog box will appear. Confirm that the information that appears is correct.
- In the "Comments" Field, indicate the date and time you prefer the pickup to take place and the number of replacement waste containers you would like to have delivered at the time of the pickup. Click Yes to complete your request.
- If you have sealed the source you want to dispose, simply send an e-mail to radwastemanifest@uab.edu and indicate the source number and isotope you would like to have picked up.
- As an Administrator, click the Inventory icon.
-
Waste Pickup Request
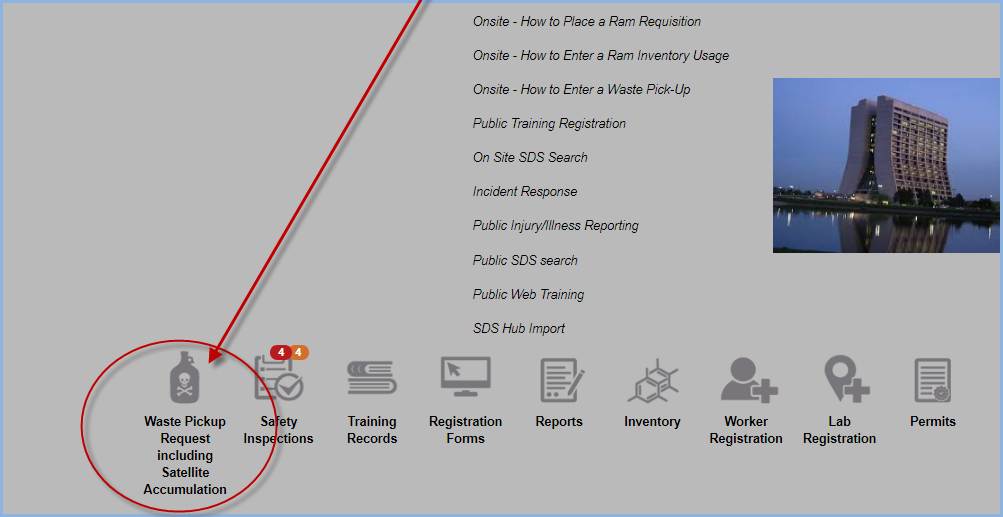
- Users with PI login menu access will select Waste Pickup Request including Satellite Accumulation from PI options menu below. Users will only see waste information for their attached PI's.
- After selecting the icon, click on “Add a Waste Request” from the toolbar menu. Users that do not have a Waste Profile will be prompted to enter one.

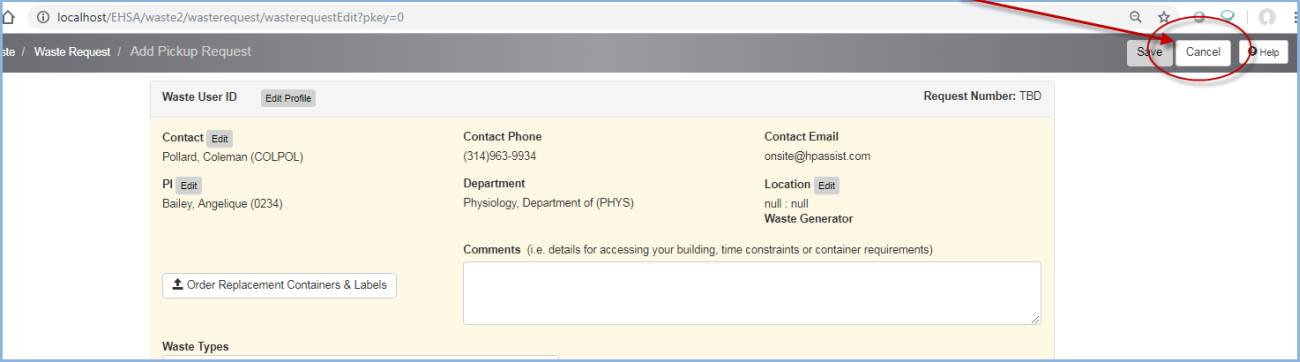
Adding a Waste Request- If the user has a Waste Request Profile, or after a new profile has been saved, the Add Pickup Request screen will be displayed.
- To view the list of existing Waste Pickup Requests, click [Cancel] without making any entries.
- The Waste Pickup Request listing is shown below.
- Users may create a duplicate waste request by selecting a request from the current list (the selected request will be highlighted in green) and clicking [Duplicate Waste Request].
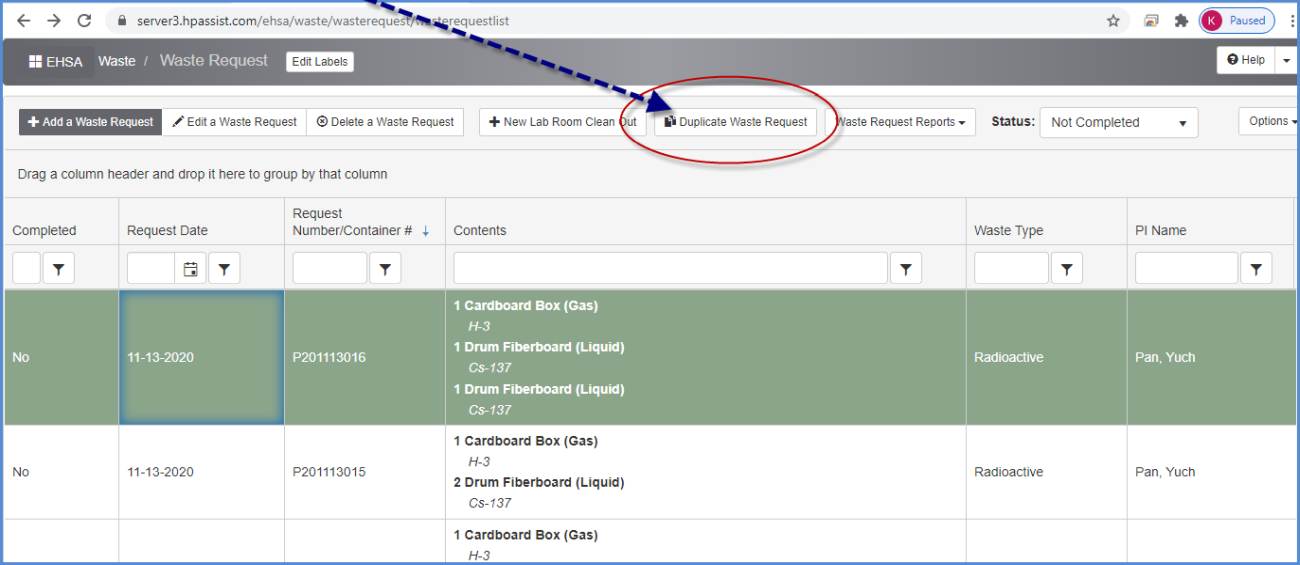
- This will create a new request that fills in the data from the duplicated request and will open for editing as needed.
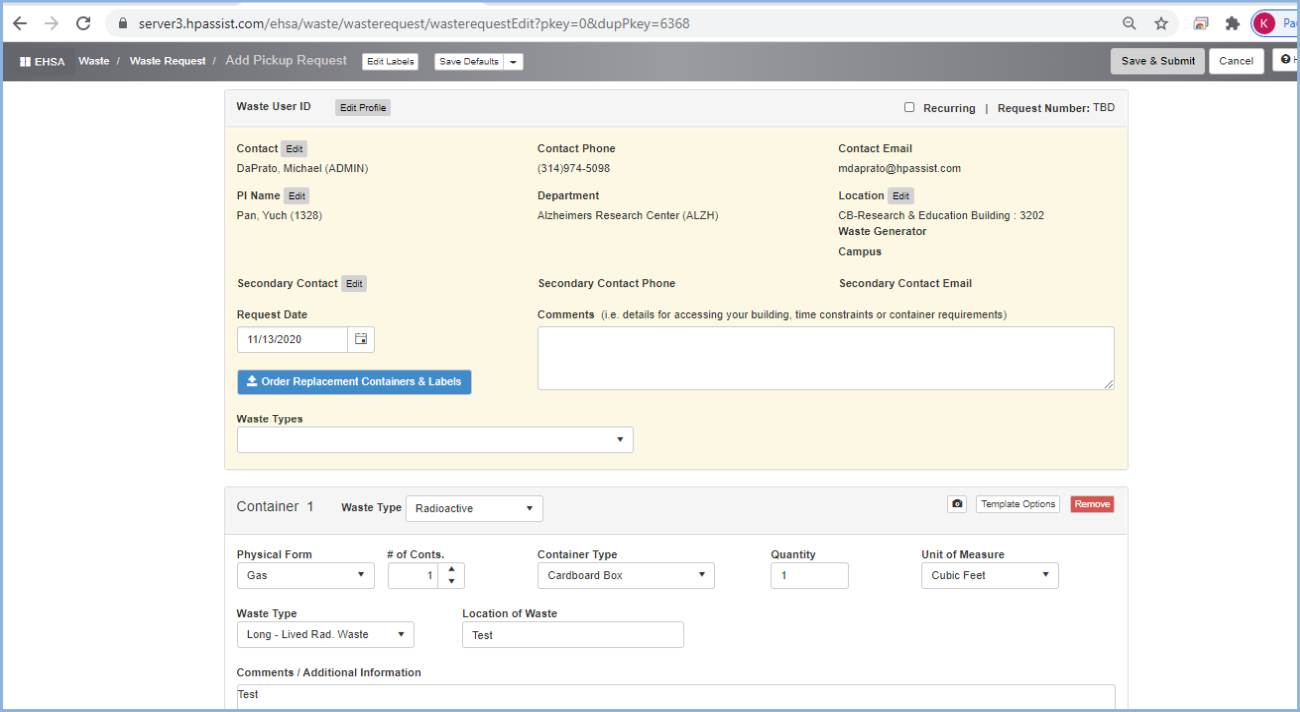
- Today's date will fill in for the Request Date.
- Edit any fields and then click [Save].
- Use filters and column sorting to view and find Waste Pickup Requests for editing. Highlight a row and click [Edit a Waste Request] to modify an existing open request.
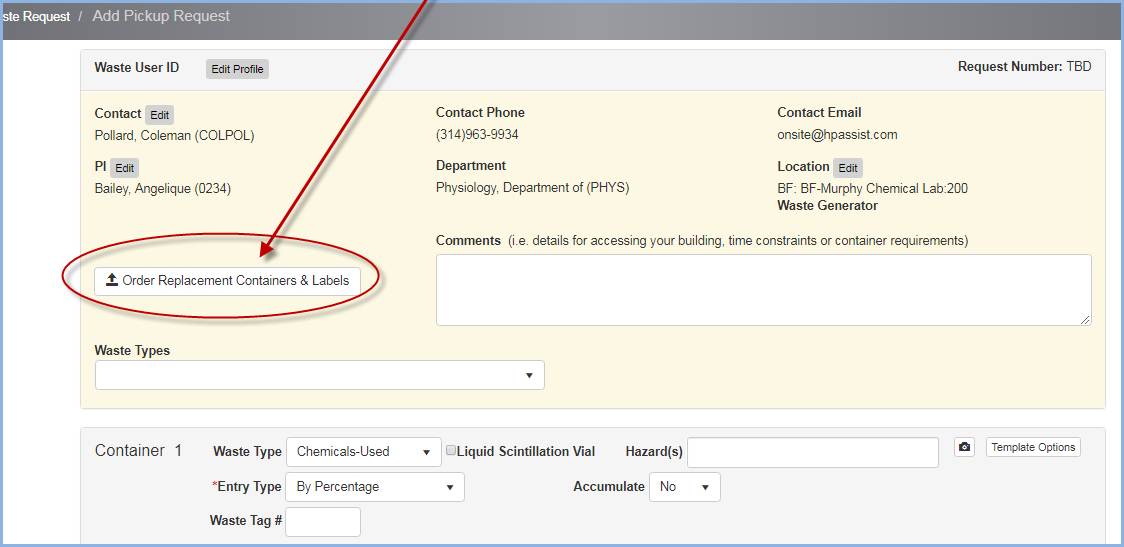
Waste Request User - The Waste Request User information is shown in the upper section.
- Click [Edit Profile] to open a profile and make any needed changes.
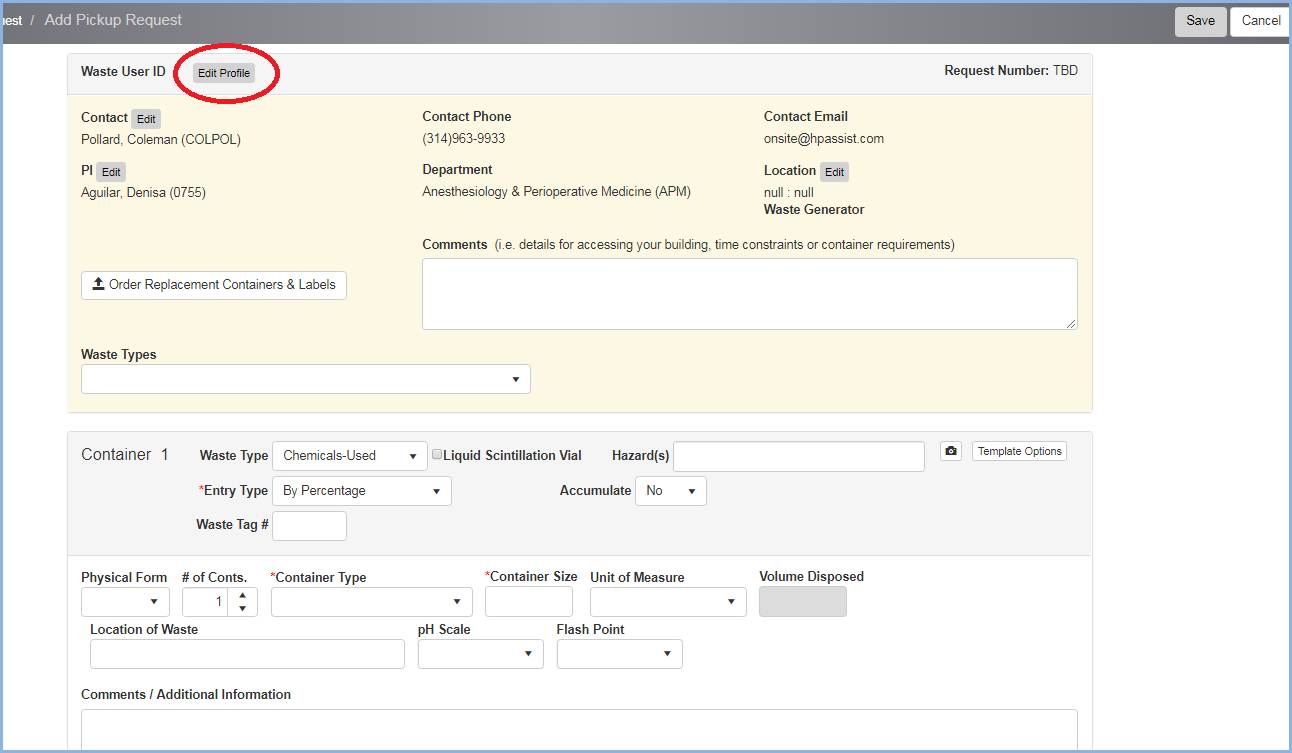
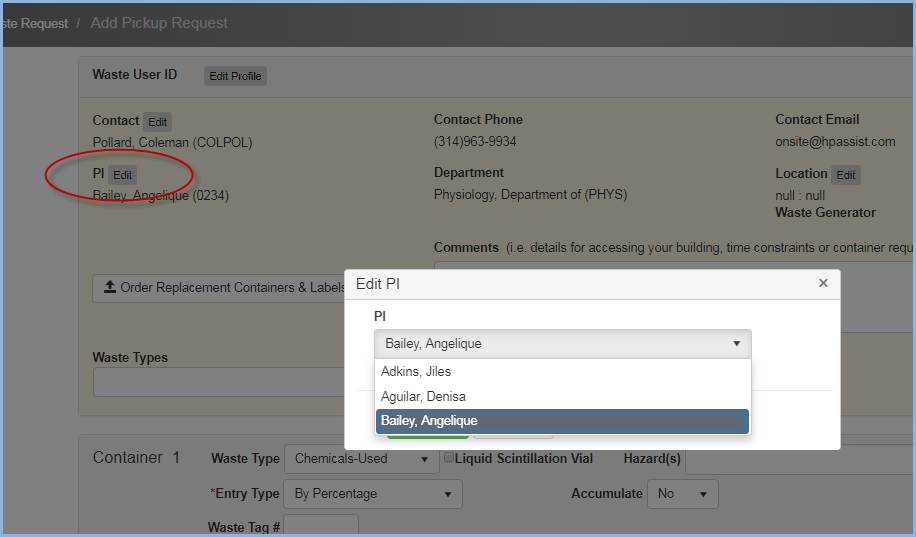
- To change the PI and select from PI's on the Waste Profile, click [Edit] next to the PI label.
- An Edit PI pop-up will open, allowing the user to select from the available PI's on the profile.
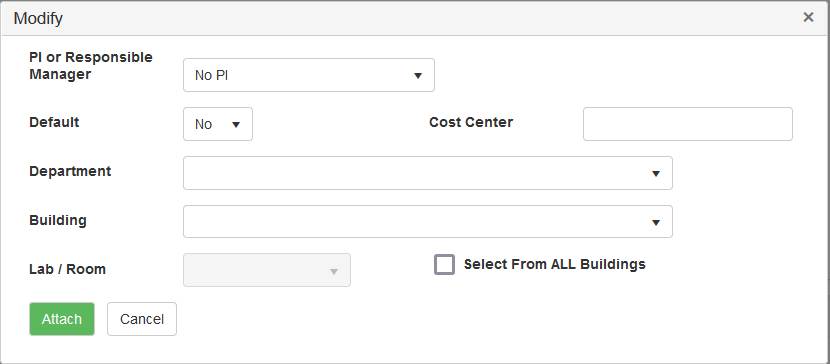
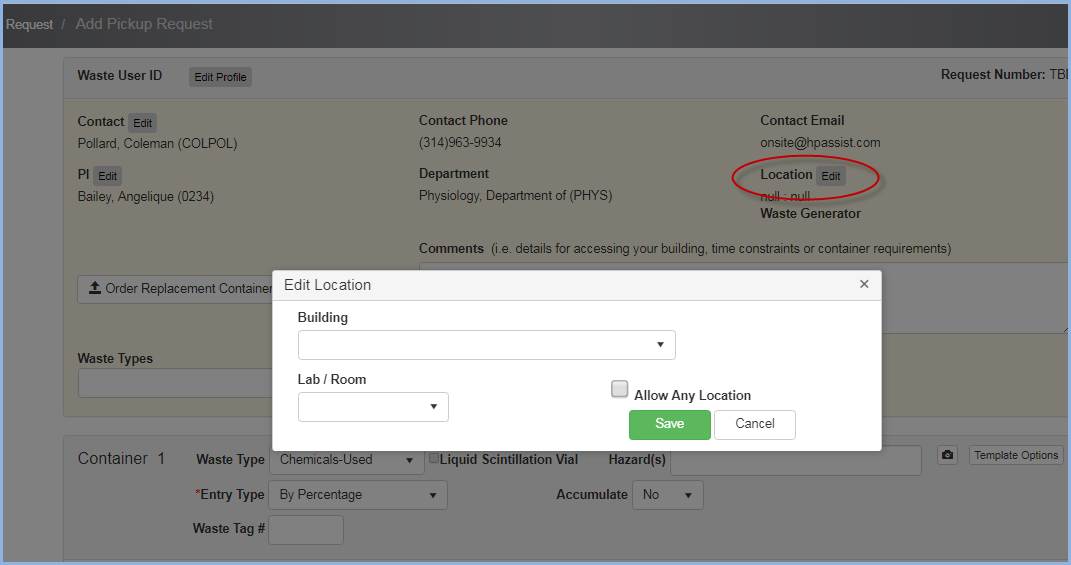
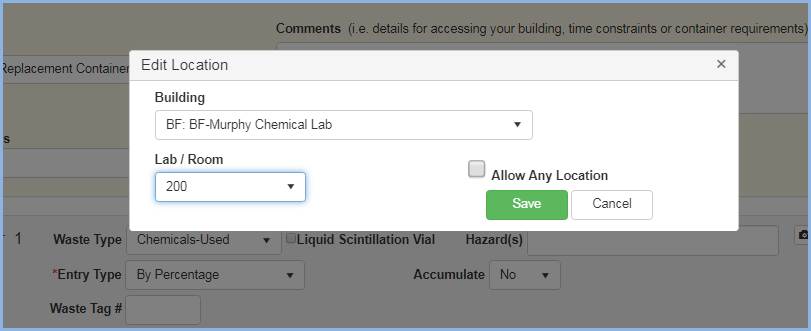
- To select/edit the Location for the pickup, click [Edit] next to the Location label.
- This opens a pop-up box to select the Building and Labs from the PI's permit.
- The user can also check the "Allow Any Location" box to select from all Buildings/Labs in the database.
- The Building and Lab combination for the PI have been selected below.
- Click [Save].
- Enter any access details or notes in the Comments box on the Waste Request.
Replacement Containers - Click [Order Replacement Containers & Labels] to open the Waste Container Request window.
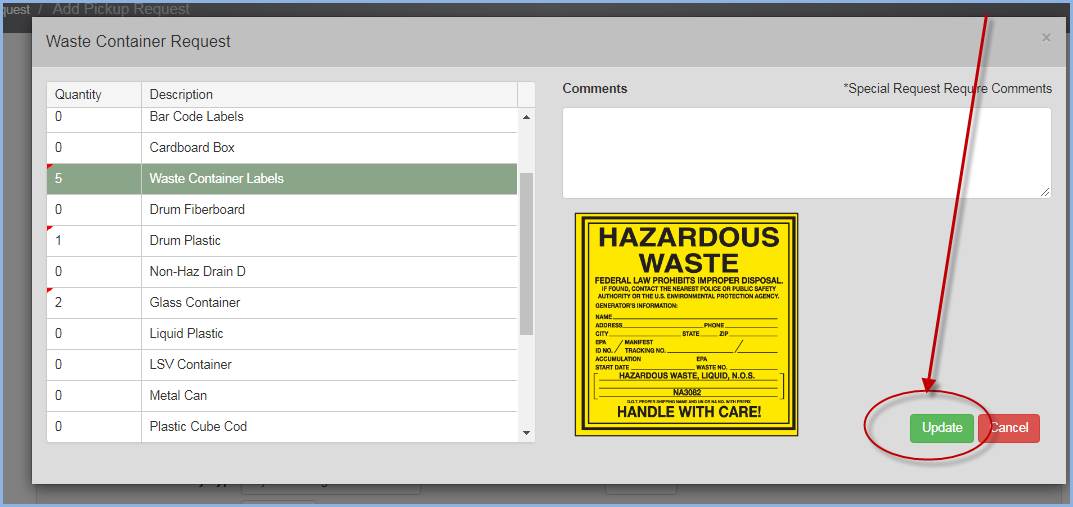
- Select items to order by highlighting and entering quantities for each item.
- Enter any Comments for each type of Waste Container/Label Request as needed.
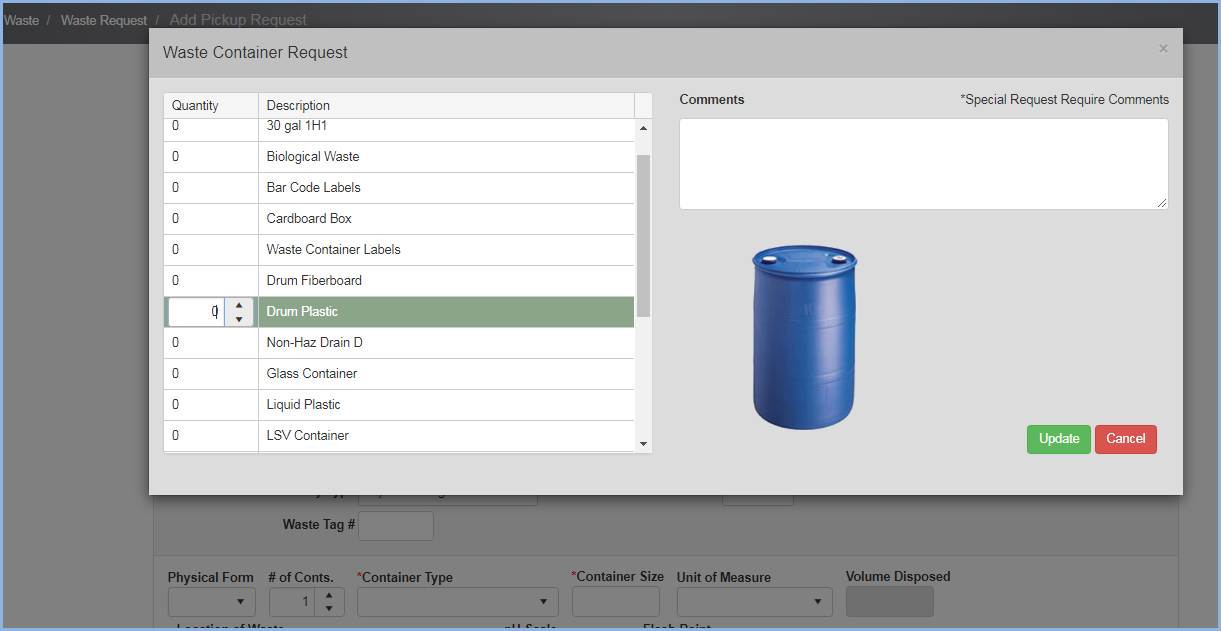
- When complete, click [Update] to save the entries, or [Cancel] to discard without saving.
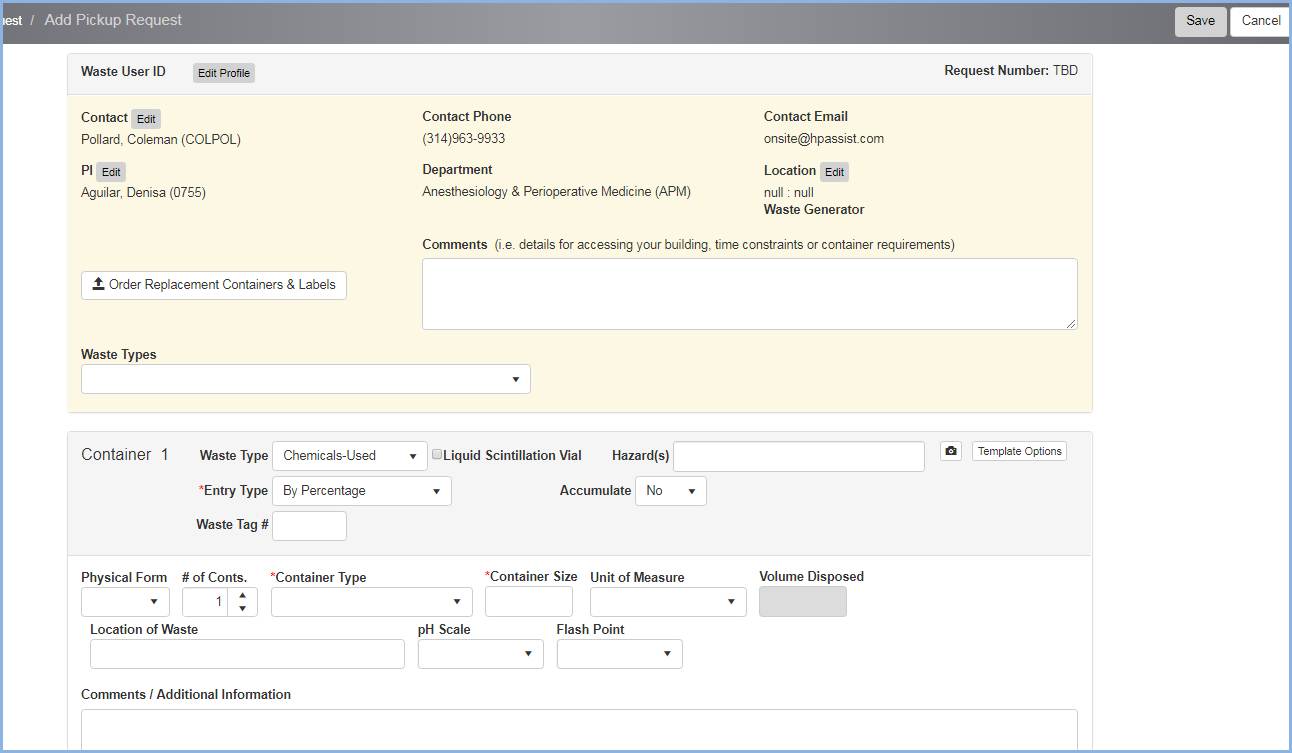
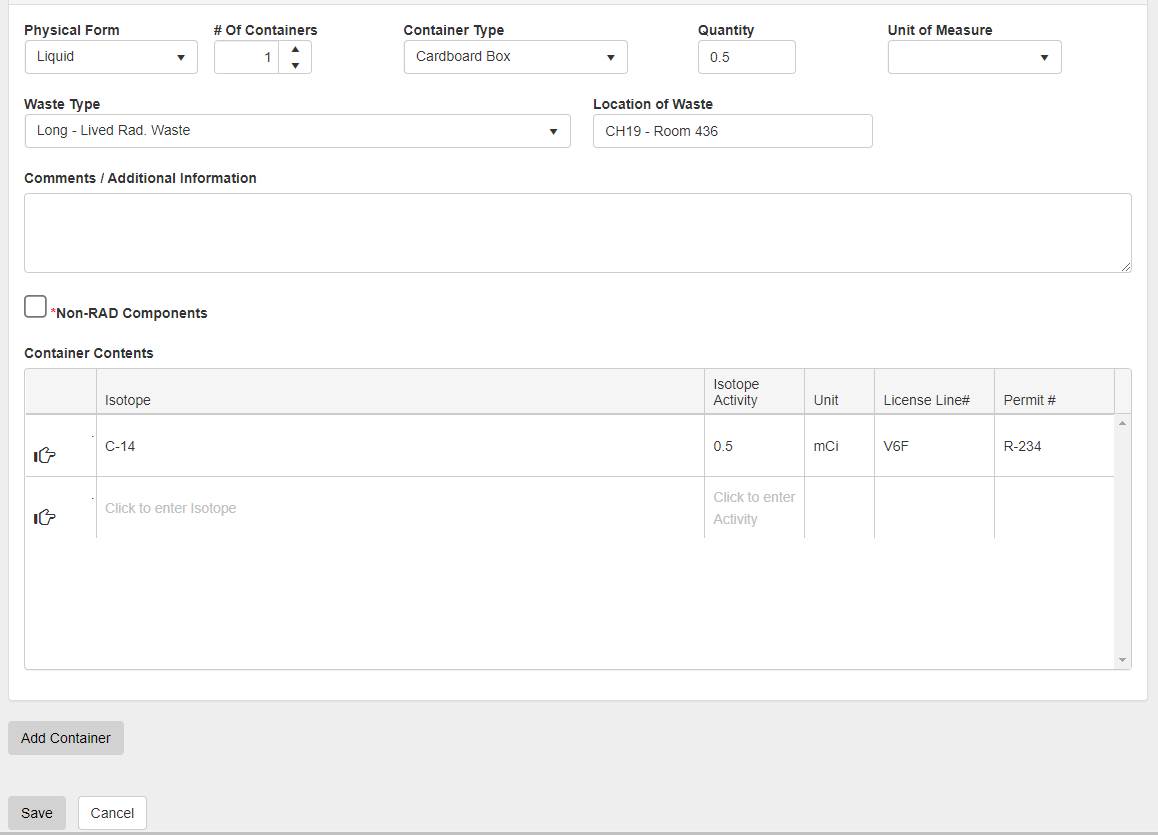
Container information - Enter Information in the Container section of the screen.
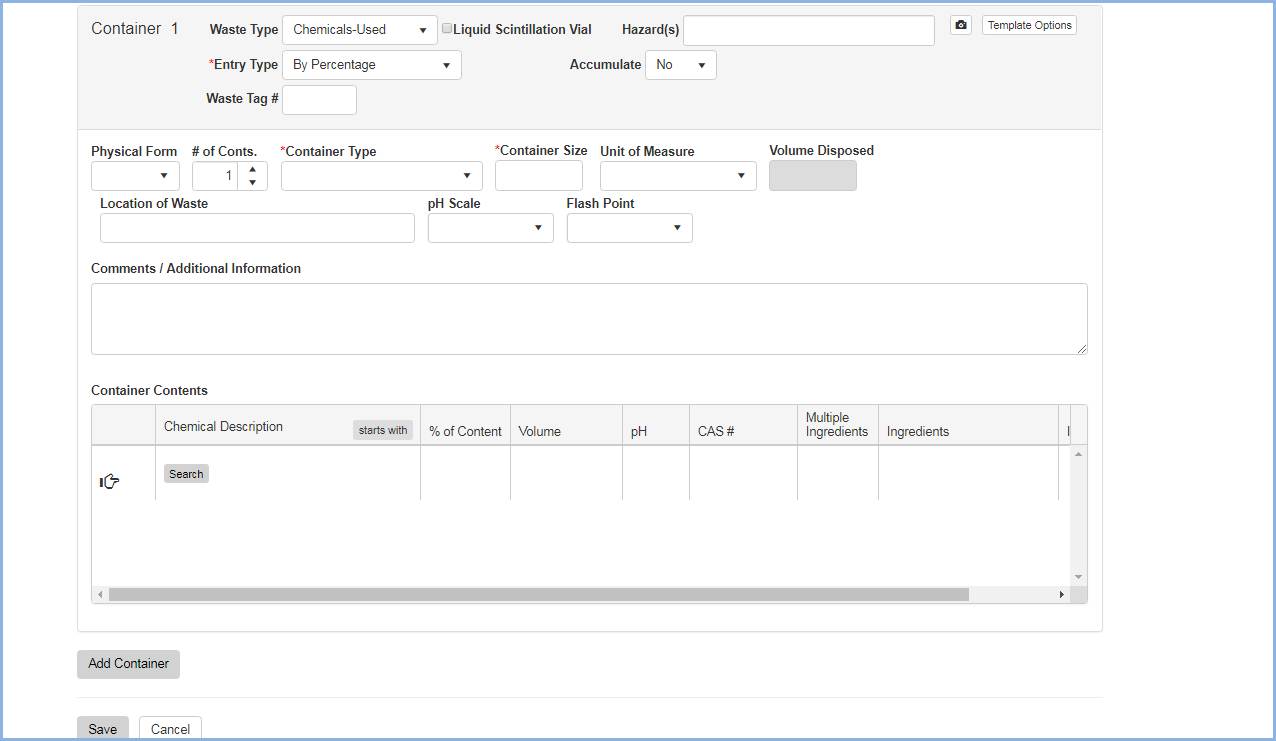
- Select Waste Type from the dropdown listing. This is an example of a waste pickup request for Chemicals Used.
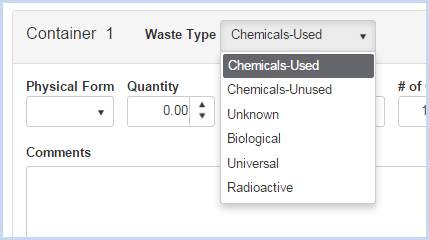
See the Help Menu from the "Waste Pickup Add or Edit" screen for examples of additional waste types.
- Continue entry of waste details. Items marked with a (*) are required.
- Select the Physical Form from the dropdown.
- Enter the Quantity.
- Select the Unit of Measure from the dropdown.
- Enter the # of Containers for pickup.
- Select the Container Type from the dropdown.
- Enter the Location of Waste in the lab.
- Select the pH Scale from dropdown.
- Select the Flash Point from dropdown.
- Enter any Comments/Additional Information needed to describe the container or its location.
- Enter the Container Contents.
- Click [starts with] to toggle between [starts with] and [contains] for the Chemical Description search.
- Select the Chemical and corresponding CAS #, Chemical #, Catalog #, and Vendor to bring into the contents list.
- The Chemical Description can also be entered directly into the field, without using the search option.
- Make any note in Multiple Ingredients field if needed.
Add Additional Container for Pick-up - Clicking [Add Container] will open a new entry section for the additional container.
- Container 2 is shown in the lower portion of the screen below.
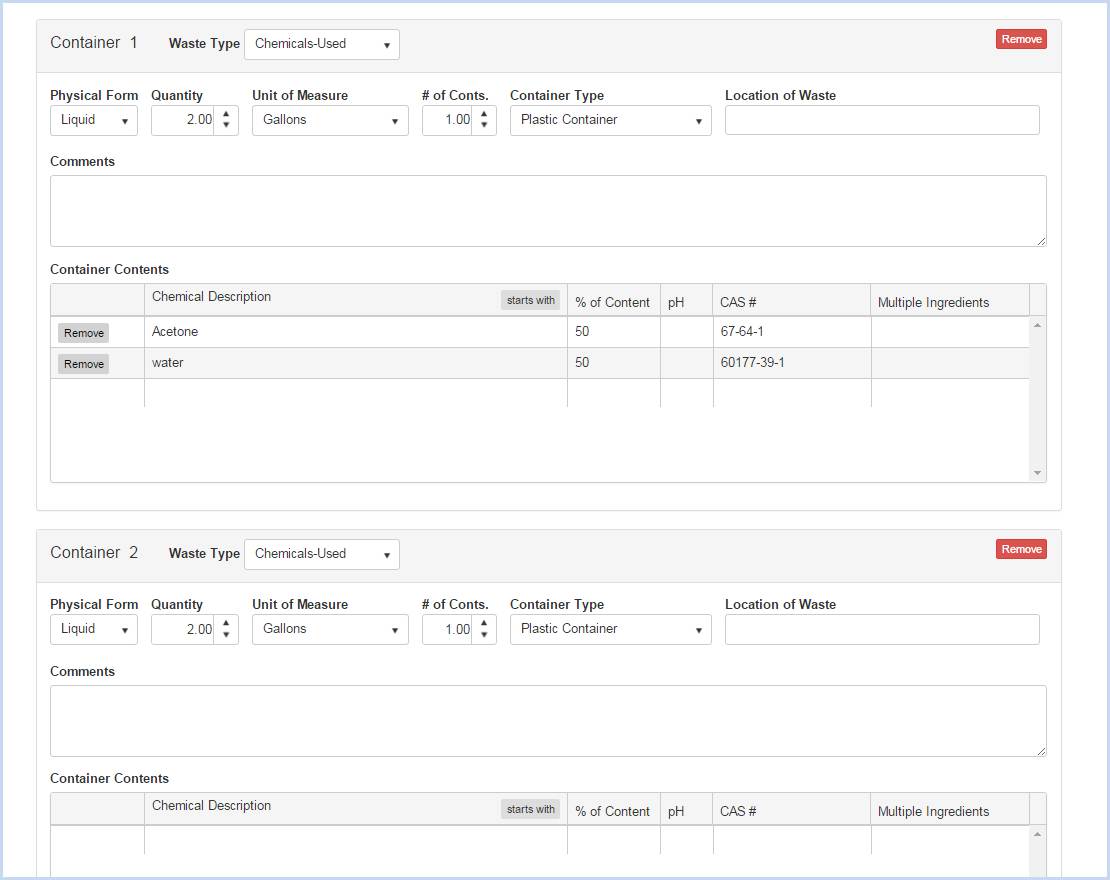
- Enter information for Container 2.
- Click [Save] when entries are complete; click [Cancel] to discard entry/edits.
Remove a Container
- Click [Remove] to remove a container from a waste request.
- When removing a container, a Confirmation window will appear.
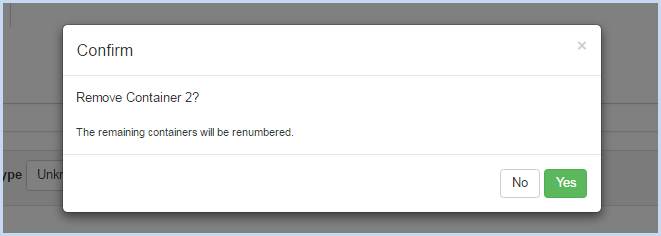
- Click [Yes] to remove the container, or [No] to cancel the removal.
- Users with PI login menu access will select Waste Pickup Request including Satellite Accumulation from PI options menu below. Users will only see waste information for their attached PI's.
Environmental Health & Safety has launched the new EHS Assistant (EHSA) system. To ensure ease of adoption and understanding, it is rolling out in phases. During each phase, EH&S will contact and arrange an orientation followed by access to the system. Access to the system will not be granted until orientation is complete. For questions, contact EH&S at EHSASupport@uab.edu