The optimal solution for sharing Zoom meetings with students is through Kaltura because it is integrated into Canvas and has unlimited storage and other educational features. If Kaltura is having issues that prevent you from sharing your videos with students there are other alternative solutions. One alternative solution is to Record your video using Zoom, download the video, upload it to UAB Box, create a shared link, then place that link in Canvas.
Note for users of screen readers: letters in parentheses in the instructions below refer to corresponding areas on example images. If you have any questions about these instructions, contact eLearning for assistance.
Step 1 - Download Zoom Cloud Recording
After you record your Zoom meeting to the cloud, you will need to download that file before it is deleted (30 days). If you recorded your meeting locally you can skip to Step 2.
- Navigate to uab.zoom.us and sign in with your BlazerID and Password.
- Click Recordings on the left and click the title of the desired Meeting.

- Click the Download button to download all files or hover over the desired file and click the download icon to just download that specific file.

- This will download an mp4 file starting with GMT to your ‘downloads’ folder of your computer. Other files such as m4a and txt files are audio and text files only.
Step 2 – Upload to UAB Box

- Navigate to UAB Box at uab.app.box.com, and log in with BlazerID and Password.
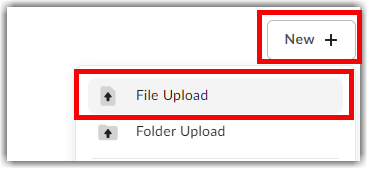
- Click New at the top right and choose File Upload.
- Locate and select the video file on your computer.
- A progress bar will show the upload status and a green banner will appear at the top when it has completed uploading to Box.
- The file will show at the top of your All Files list when completed. The name of the file can be changed by hovering over the title and clicking the Pencil.

Step 3 – Create Shared Link
- Hover your mouse over the file or folder of files in UAB Box and click the Chain Link icon.

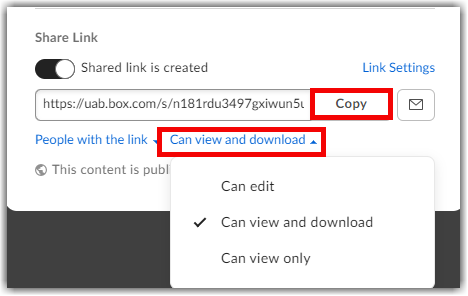
- Click the blue text ‘Invited people only’, and change the selection to ‘people with the link’ so that it becomes a public link that can be accessed without you having to type everyone’s email addresses in.

- Choose if you want viewers to have the ability to view and download or edit or just view.
- Finally Copy the provided link to your clipboard by clicking Copy beside the URL.

Step 4 – Place in Canvas
Once you have the link used for sharing, you can place that link in Canvas in various ways. Click through the options below to see the different ways you can provide the link to your students.
-
Provide link in Module
You can insert the link as an item in your modules as shown below.

Follow the instructions in this Canvas guide to place a link in a module.
-
Provide link in an Announcement
You can send the link in an announcement to your students that will be sent to their email and be housed in the announcement tab of your Canvas course as shown below.

Follow the directions in these Canvas guides to Create an announcement and insert an external link.
-
Provide link in a Page
You can hyperlink the link in a page so that you can provide context or other files along with the recording as shown below. You can also add this page your modules.

Follow the instructions in these Canvas guides to create a page in your modules and add an hyperlink to the page.